Allocating your clients to groups can help keep your clients organised. Groups are useful if you want some users (practitioners) to have access to some groups of clients or if you’re analysing outcome data on a group specific level, or when doing a mass assessment email to the group.
If you’re part of a practice with multiple users (practitioners) you can use groups to make clients (patients) who belong to that group visible to some users. This is an alternative method of controlling client access by individually assigning clients to particular users.
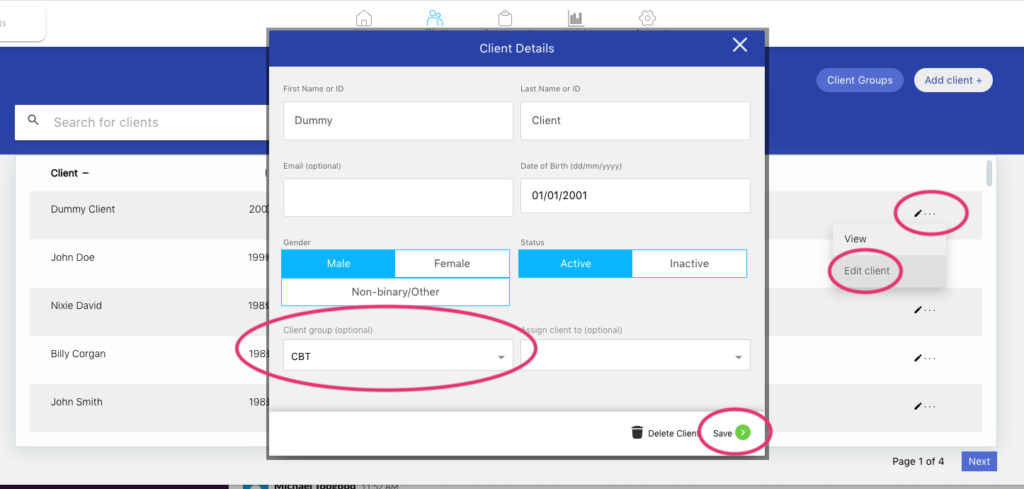
Examples of when groups might be useful include if you’re wanting to analyse your outcome data on a group specific level. For example, if you want to compare treatment response for a group receiving CBT versus a group receiving psychopharmacotherapy, you could create two groups, and allocate clients to those groups. When data is downloaded and analysed the group for the client will be recorded.
Note, if you are part of a Practice, only Account Managers and Supervisors can create or edit groups, while Practitioners have access to allocate clients to existing groups.
Below are instructions.
If you’re part of a practice with multiple users (practitioners) you can use groups to make clients (patients) who belong to that group visible to some users. This is an alternative method of controlling client access to individually assigning clients to particular users.
That user will then have access to all the clients included in that group. To remove their access to those clients, you can remove the user from the group following the same process.
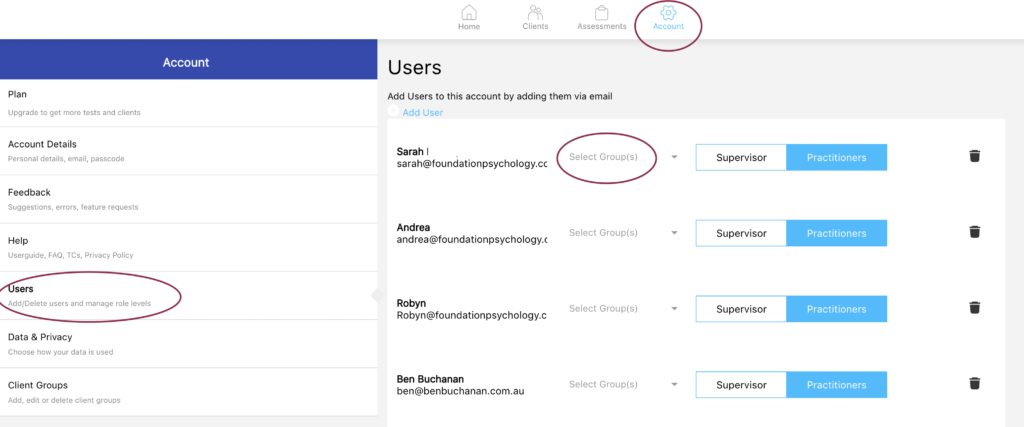
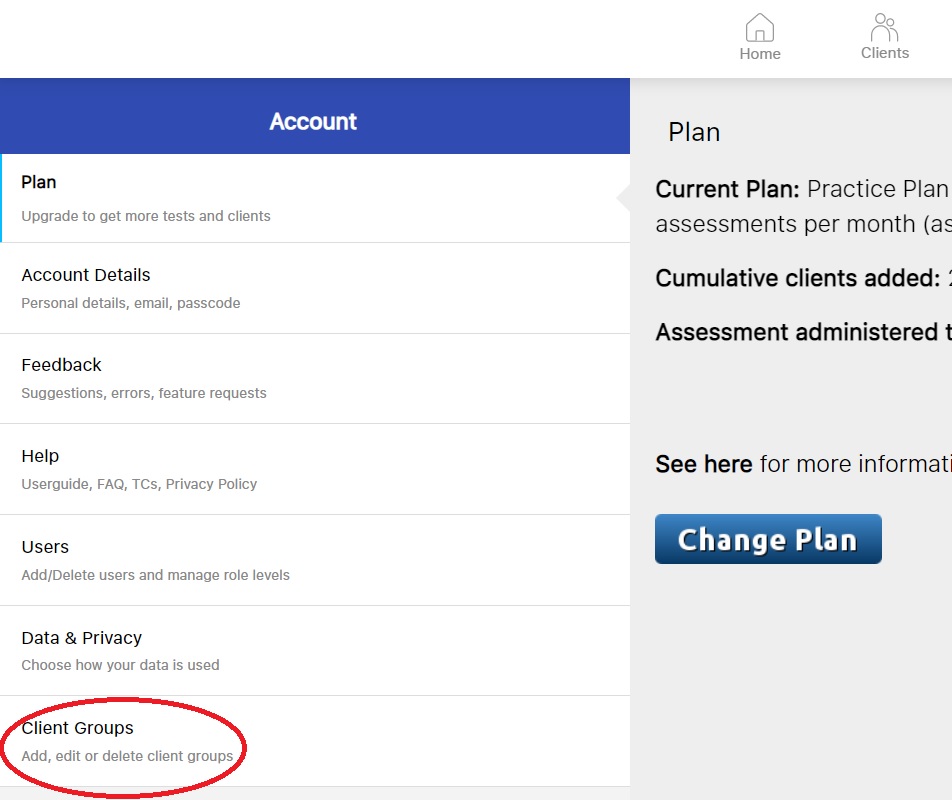
1. Go to the Account tab of your NovoPsych account.

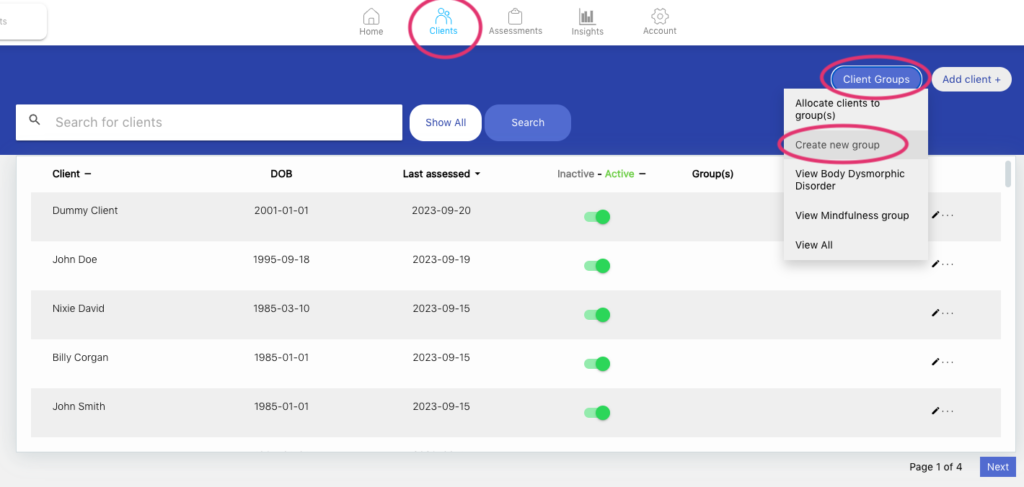
2. Click on “Client Groups”.
3. To create a new group, click “Add Group”.
4. Type in the name of the Group you want to create.
5. To add clients to a group, click on the “View Clients” option of the group.
6. On the top right hand corner, there is a green button called “Add Client”. Click this button.
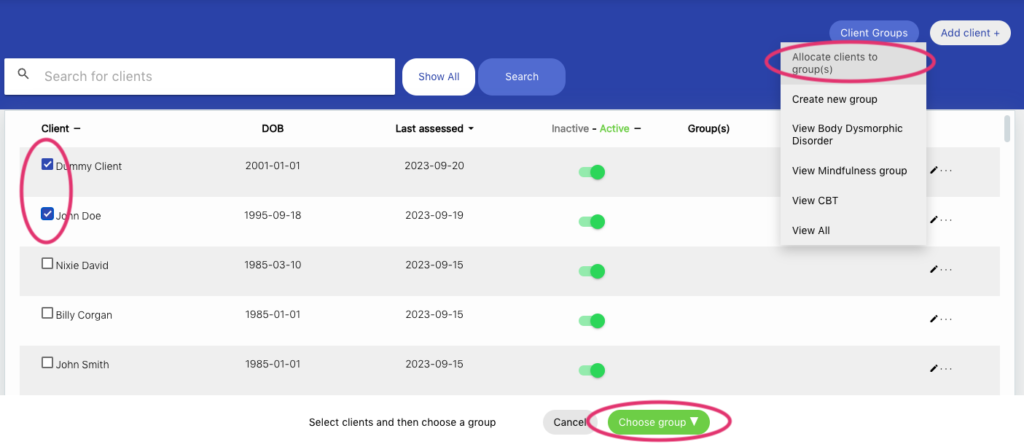
7. A list of all clients on the account will show. Select the clients you wish to have added to this group.
8. To remove a client from a group, click “View Clients”
9. Click “Remove from Group”. To confirm the removal, click yes